DIY Foil Art Prints – How to Make Your Own Foil Art
As an Amazon Associate, I earn from qualifying purchases. This post may contain affiliate links. See our full disclosure here.
 If I knew how easy it was to make DIY foil art prints, I would have starting making my own years ago. It’s funny because something so beautiful seems like it would be crazy difficult to make. But in reality you only need a few key supplies (that aren’t even very expensive). I’ve also provided from free downloadable art files below to get you started.
Watch the video below to see how I make my own DIY foil art prints and then see the supplies and step-by-step directions in the post so you can make your own.
DIY Foil Art Prints Supplies (affiliate links provided for convenience):
- White Cardstock – I use 65lb white cardstock.
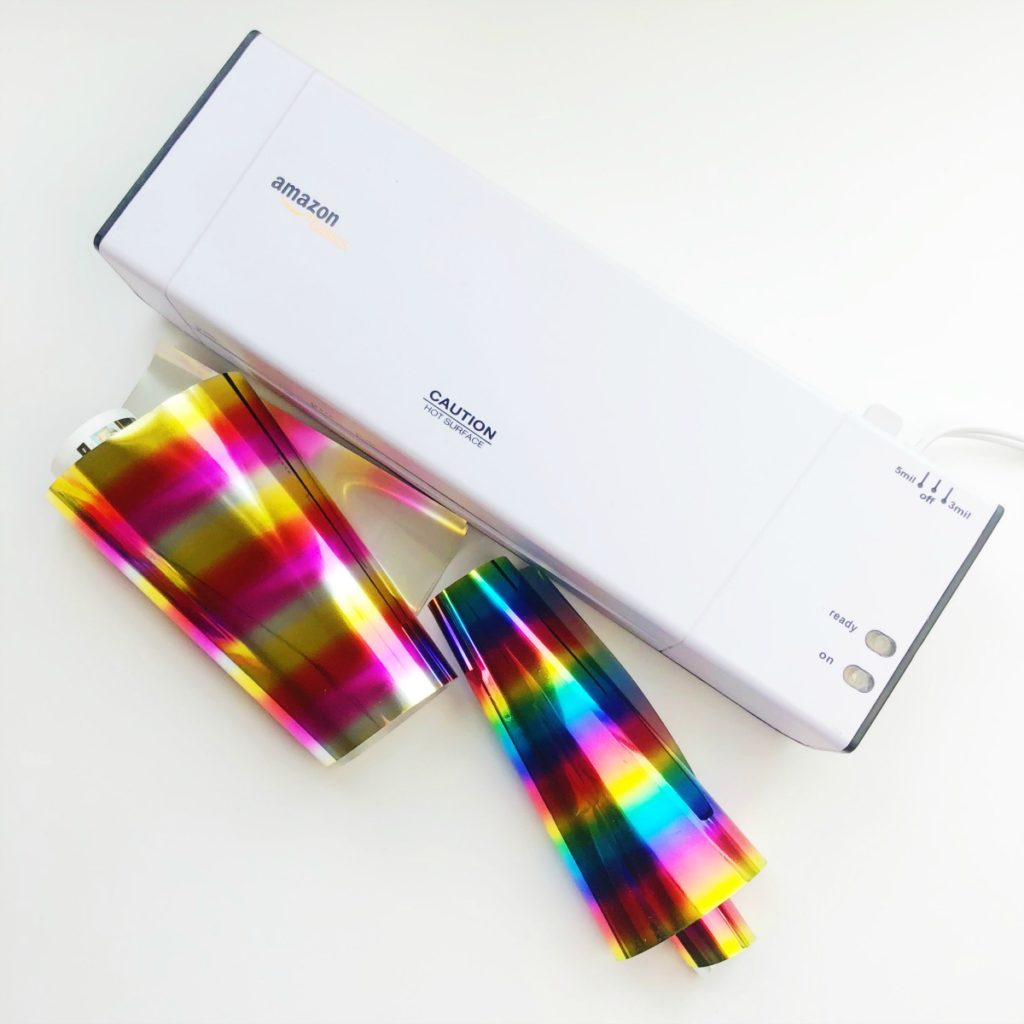
- Foil Transfer Sheets – Here are a few of my favorite foil transfer sheet colors rainbow foil, watercolor foil multi-pack, and solids foil multi-pack.
- Laminator – I have this inexpensive laminator and it works wonderfully!
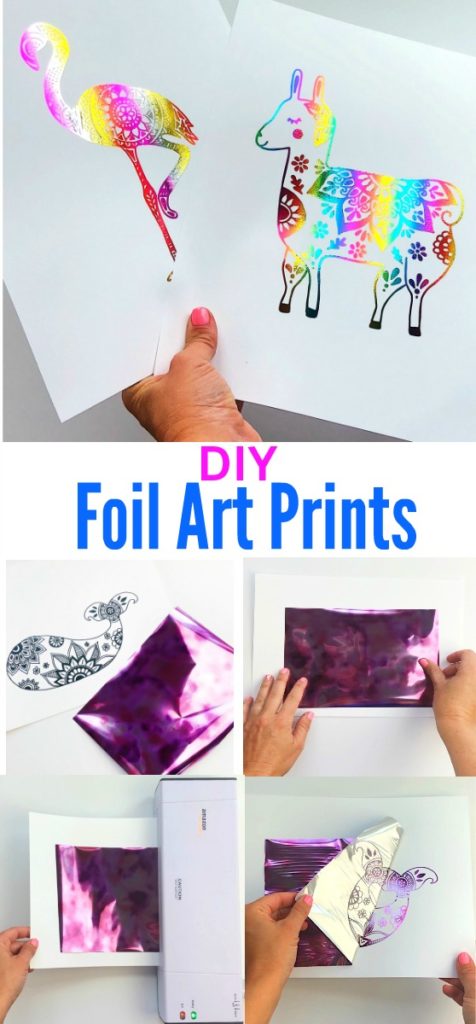
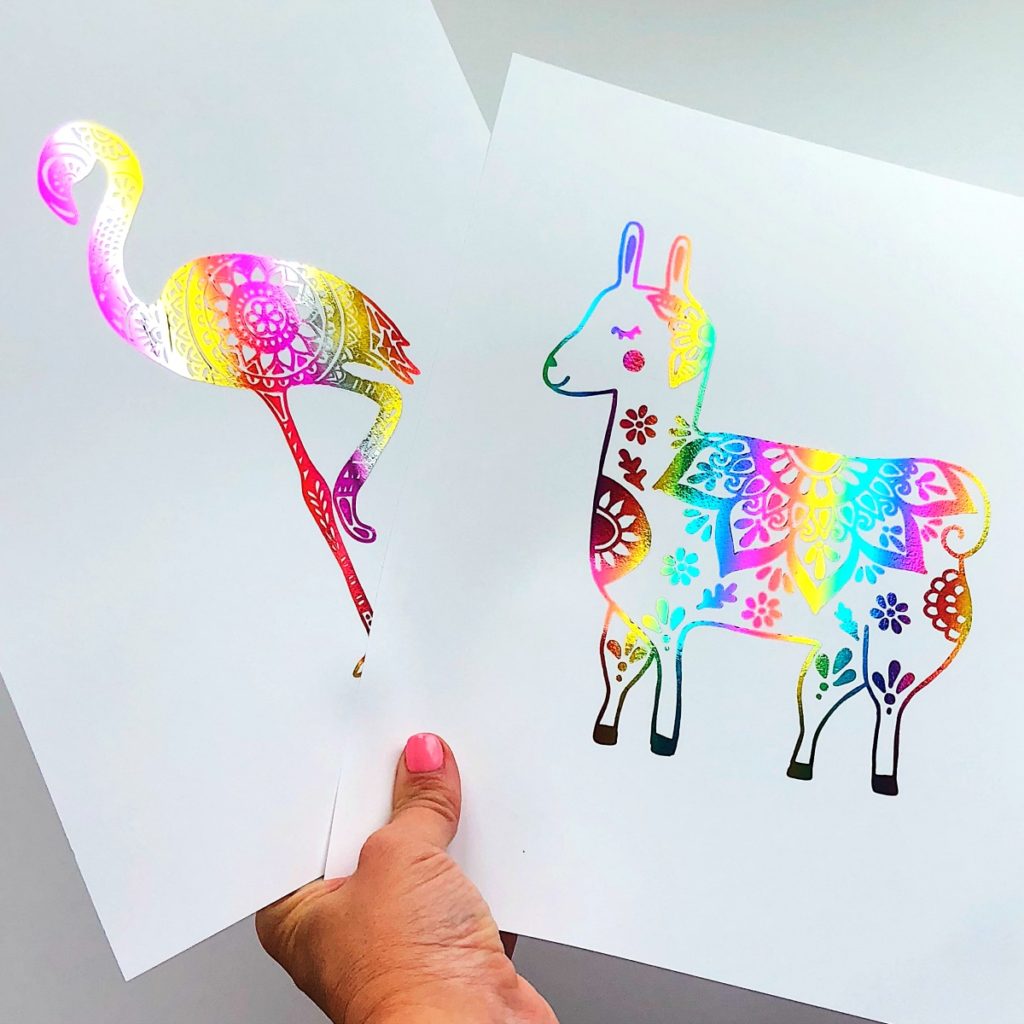
- Art Files – I’ve created three to get your started. You can use any other art files, but it will need to be printed in black and white. Download the files here: llama, whale, flamingo.
- Laser Printer – I have this laser printer. But don’t worry if you don’t have one, just head to your nearest Staples, Office Depot, FedEx Office or anywhere that makes prints and copies and have them make the prints for you. Just be sure they are made with a laser printer.
 DIY Foil Art Prints Directions:
Step 1: Print your art prints on white cardstock using a laser printer. Use your own or download the files I created here: llama, whale, flamingo. You might need to reduce the printing % based on the the size of the foil piece you are using. 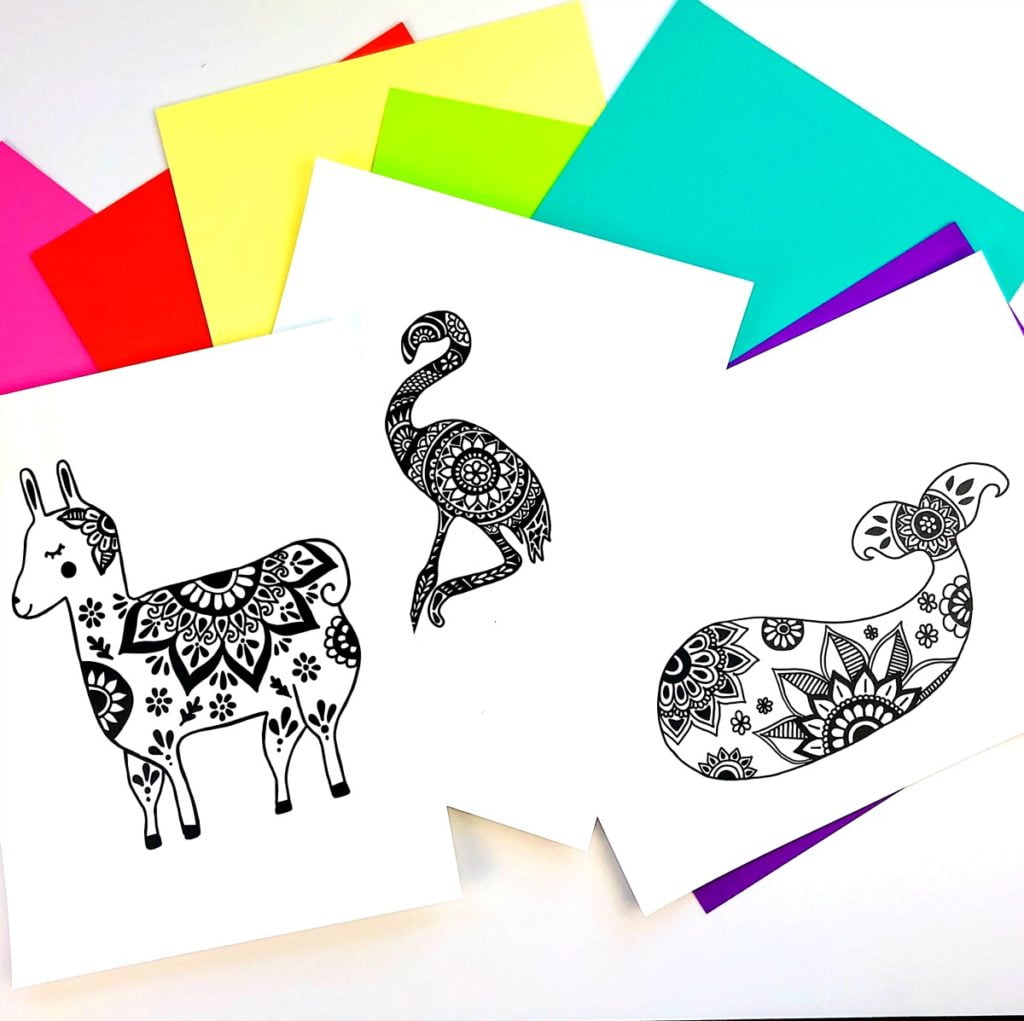 Step 2: Cut the foil down to size and place a single piece of art foil over the image. The foil should have the color side up. See above under supplies for my favorite foil colors.
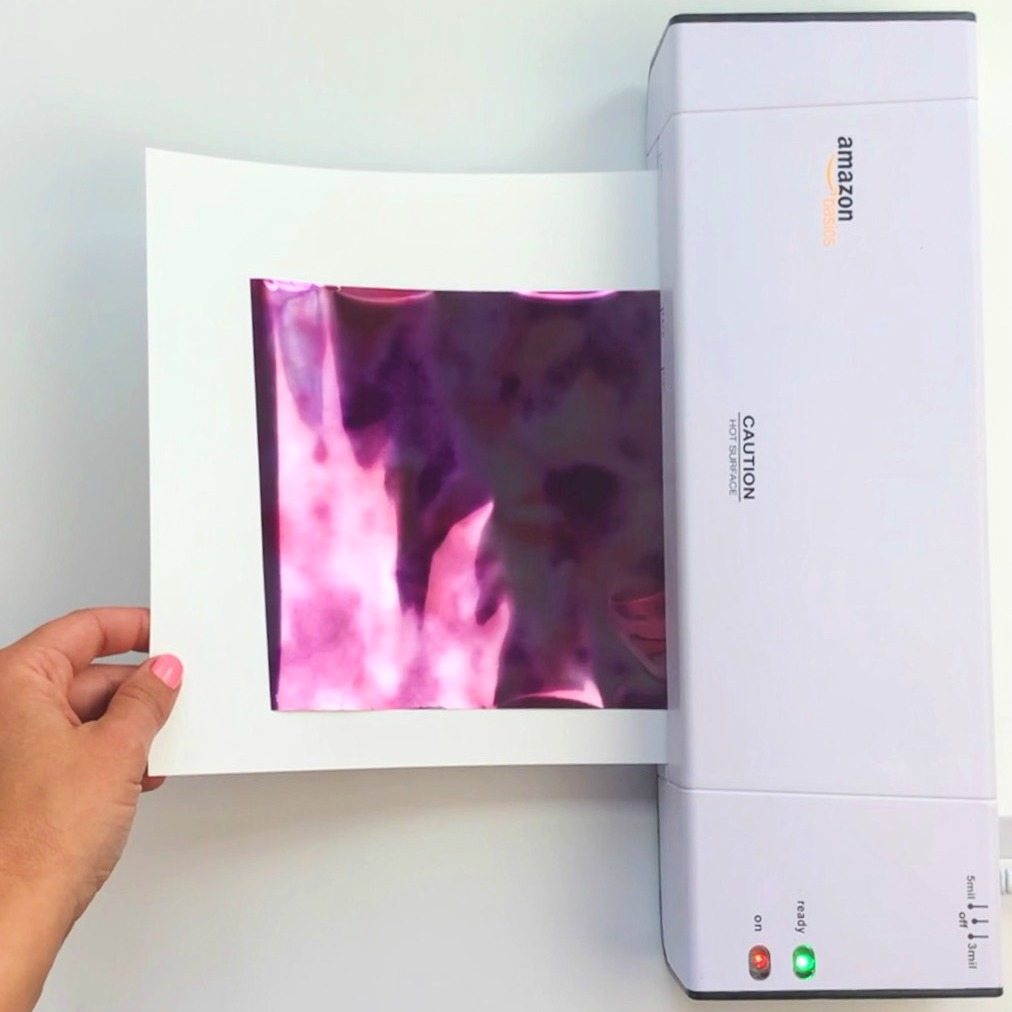
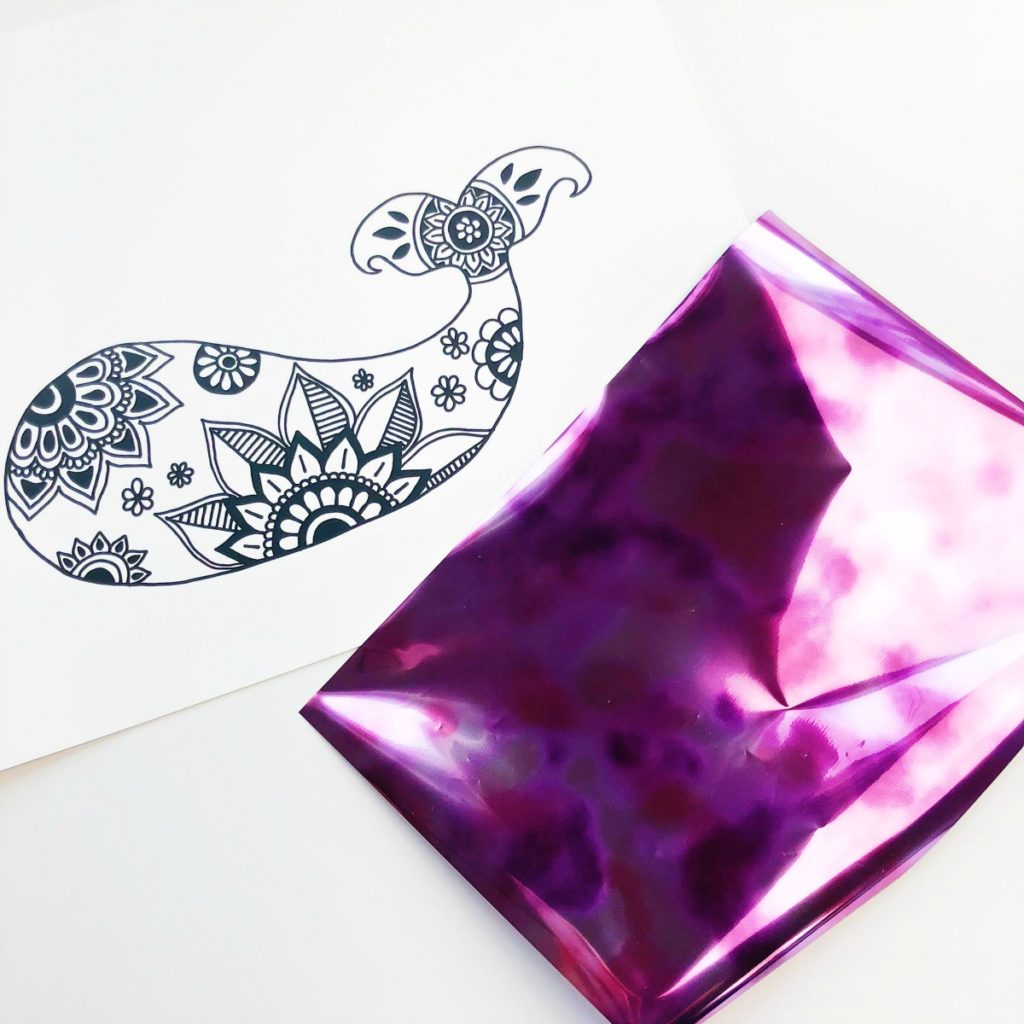 Step 3: Turn on the laminator and once heated, feed the cardstock art print with the foil on top through the laminator. I hold the foil in place as it’s going through the printer until it takes hold.
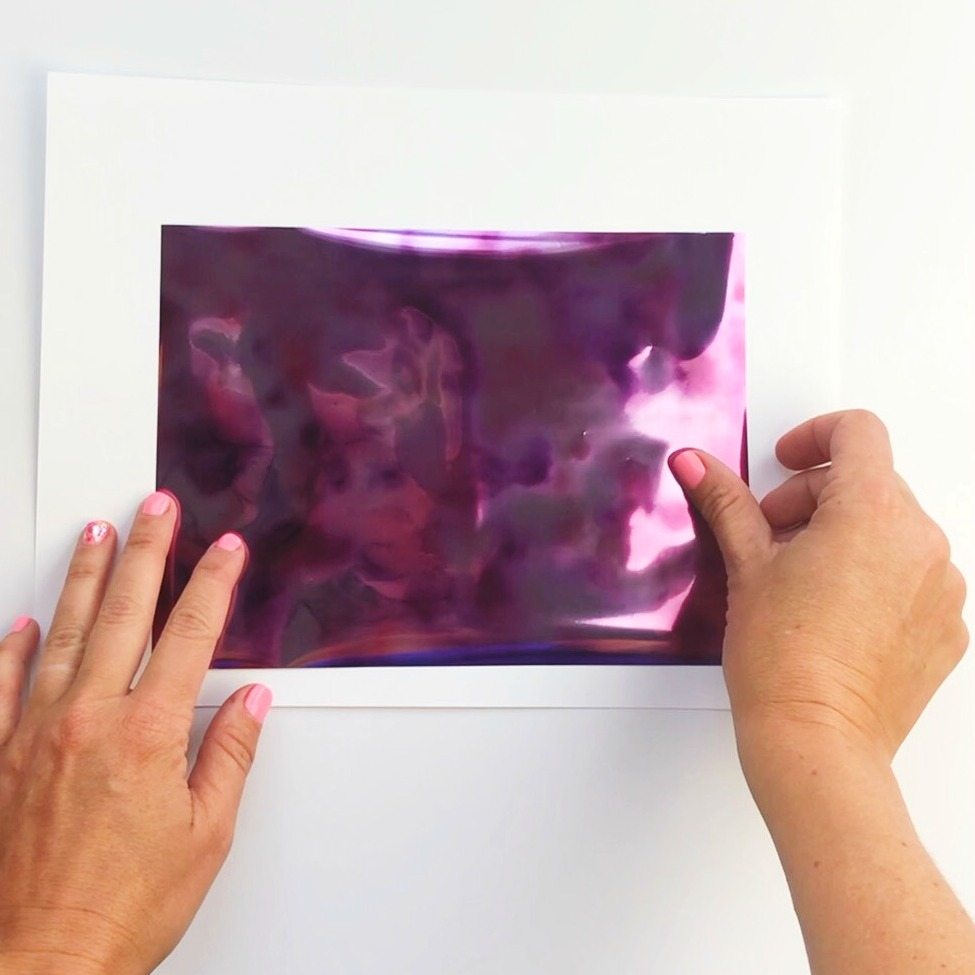
 Step 4: Once through the laminator, slowly peel the foil back from the cardstock.
  Step 5: Preserve your completed foil art prints with a frame and add them to your wall decor.
 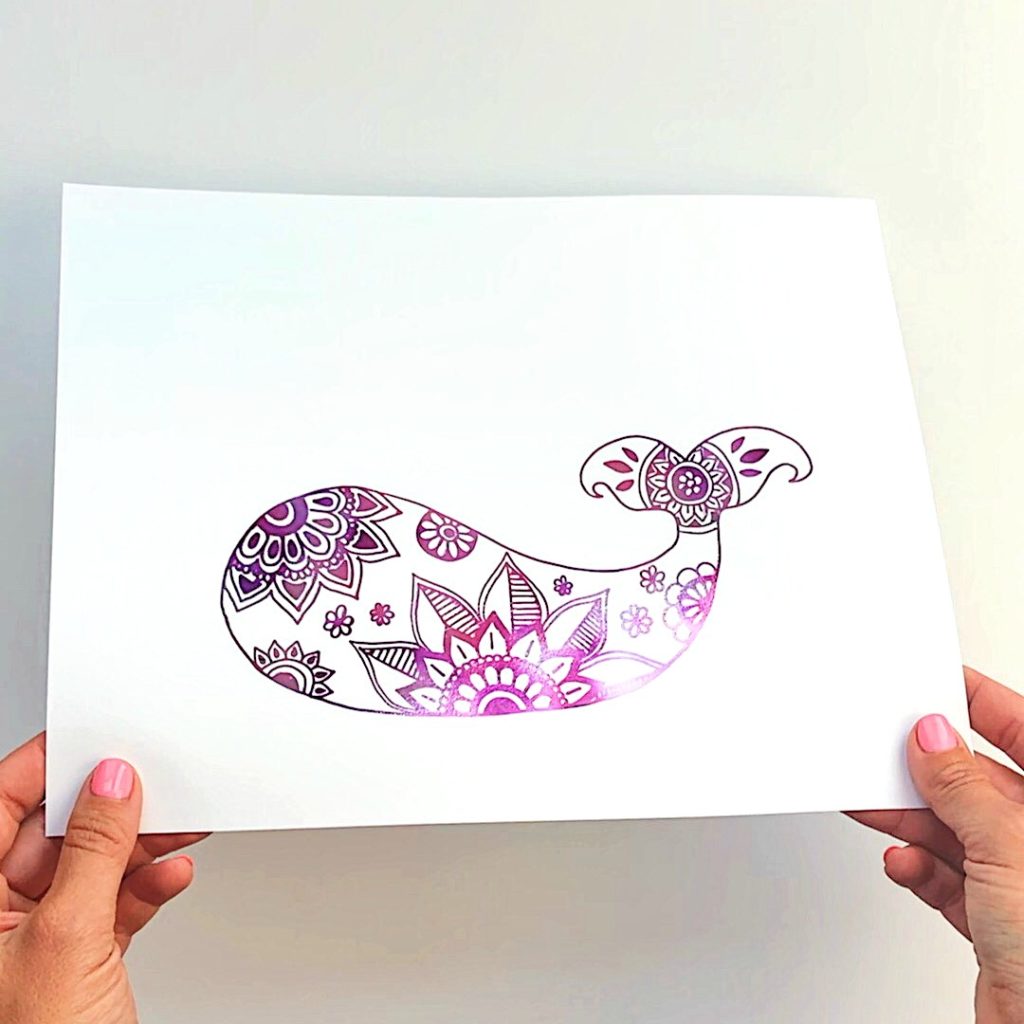 See it’s much easier that it looks. Now that you know how to make your own foil art prints, there are so many fun possibilities.
 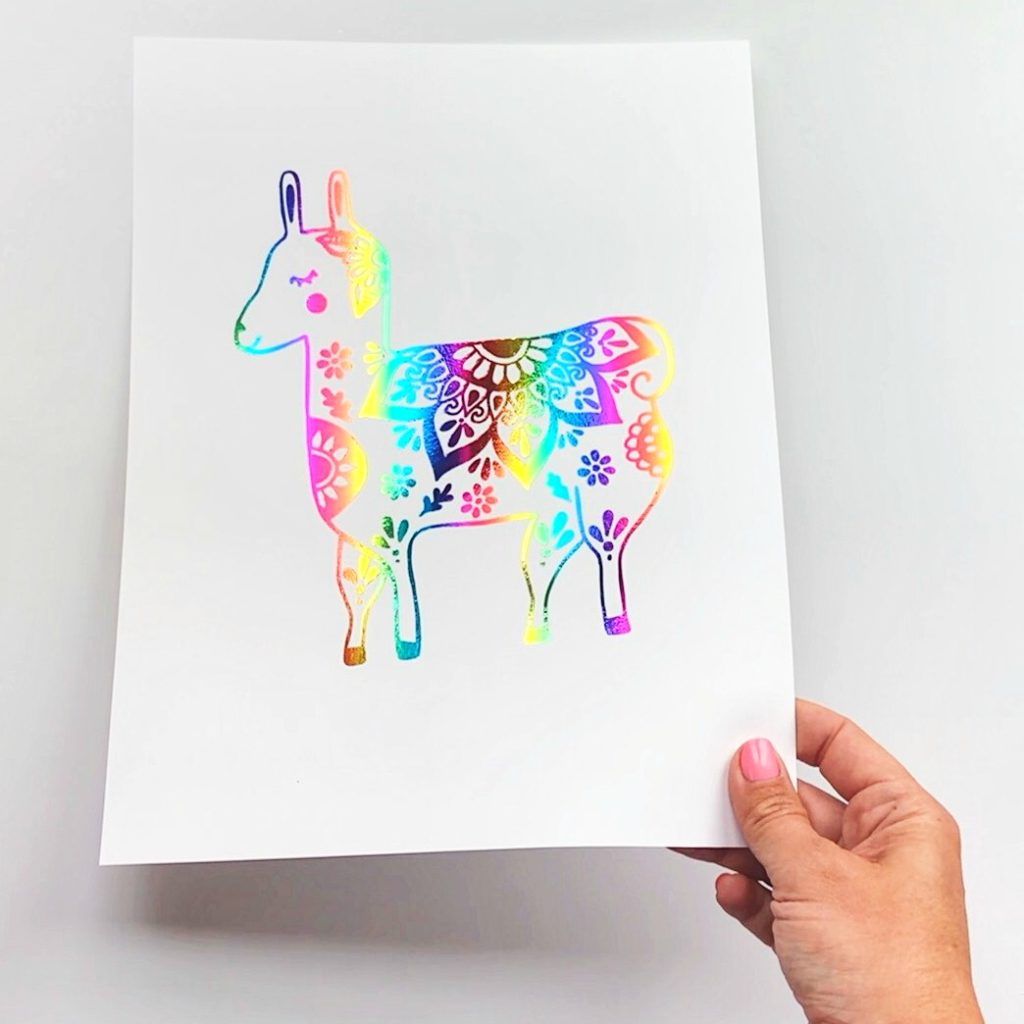 For more colorful inspiration, head over to my Instagram page or Facebook page And be sure to come share with me pictures of your finished foil art prints. I love sharing projects that were inspired by my tutorials with my followers.